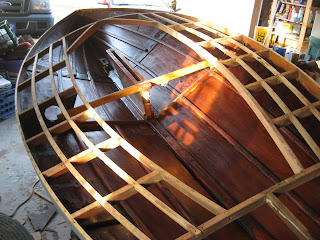
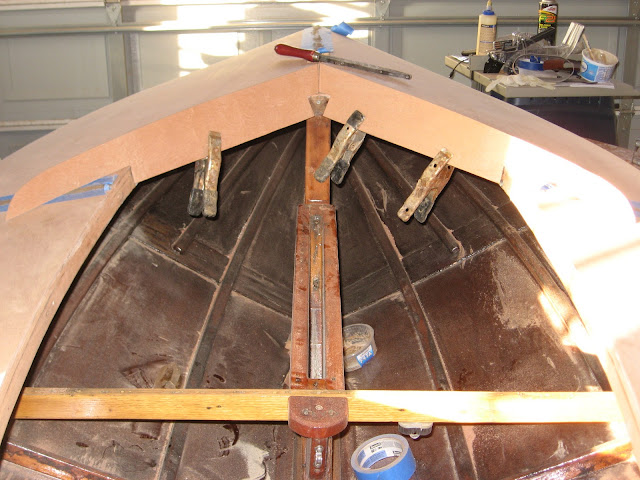
I made quick work of the excess wood with my router and a trim blade. I then used the best tool in my locker... The Belt Sander!!! The router took the wood down to about 1/8 of an inch. The belt sander got it the rest of the way. A little more work with the random orbiter sander and we'll be ready for some finish. I did make new splash boards but I made them out of Ocume. I'll make new ones from the mahogany. It's hard to see but the joint between the fore deck was minimal. I made up some sawdust and yellow glue and filled in the void.
This is how I spent my Sunday afternoon. I made the splash rails from the ones I took off of the boat. They made a good pattern but like anything else it needed a lot of custom fitting. After all said and done I think they look good.
It's January 31 and this is what I got done today. I glued the splash boards on and fitted and glued the brestplate. That was the original part from the boat. It came off in 3 chunks and somehow I managed to save it. I glued it back together and cleaned all the paint off of it. The two little quarter rounds at the end of the boards are another matter. I don't have a good way yet to clamp them while the glue dries. I'll figure something out.
This is what the front side looks like.

This blog is about the restoration of a 1963 Fletcher Cates Moth boat. The boat was made in Haddenfield NJ. By Blair Fletcher. Blair Owed Fletcher Marine and made many boats for the Moth fleets of Southern NJ. I sailed against these boats with a Cates design by Carl Patterson. I built my Cates at Pattersons' shop around the same time this boat was under construction. This picture was taken September 1965. It's me in my Patterson Cates.
Saturday, January 28, 2012
Thursday, January 26, 2012
Foredeck
The packing tape worked. The glue setup overnight and I had some time to fit the other deck. It took about an hour to fit the two sides. I did have to use nails to hold the deck on.
I fitted the aft deck and we'll get some glue on it this afternoon. She is starting to look like a Moth again.
And we have all the decks on the boat.
I fitted the aft deck and we'll get some glue on it this afternoon. She is starting to look like a Moth again.
And we have all the decks on the boat.
Wednesday, January 25, 2012
Rough fit for the decks
I cut all the parts out for the deck. Now comes the hard part. Getting them all to fit!
I fitted and glued the port deck on. I only used one nail and that is at the extreme front of the bend. It will be covered by the bow chainplate. I used reinforced packing tape and clamps to hole it while the glue sets up. I hope they hold!
I fitted and glued the port deck on. I only used one nail and that is at the extreme front of the bend. It will be covered by the bow chainplate. I used reinforced packing tape and clamps to hole it while the glue sets up. I hope they hold!
Friday, January 20, 2012
Ready for the deck
I finished up the restoration of the interior of the boat. I'll put another coat of varnish when the weather cooperates.
On our way back from babysitting our new granddaughter I stopped off at CLC and picked up two sheets of Sapele mahogany. The jury is still out on this stuff. Normally I use ocume ply. Ocume is light weight and gives a very nice finish. I chose Sapele for this project because I wanted a darker color on deck without using stain. Time will tell.
On our way back from babysitting our new granddaughter I stopped off at CLC and picked up two sheets of Sapele mahogany. The jury is still out on this stuff. Normally I use ocume ply. Ocume is light weight and gives a very nice finish. I chose Sapele for this project because I wanted a darker color on deck without using stain. Time will tell.
Thursday, January 19, 2012
Tuesday, January 17, 2012
Interior stain
It took some time but I finally got the interior stained. It took a lot of stripper, sandpaper and scraped knuckles. I decided to do the entire inside the same color stain. I used red mahogany because that's the kind of wood it is. I also stained the stringers. They are a different wood but I could not get all the varnish off and they were blotchy. Now we can start building!
 |
| Before |
 |
| After |
Sunday, January 8, 2012
Varnish removal
I spent the better part of two days trying to remove varnish and crud that was on the interior of the boat. I first tried sanding. That didn't work because I really couldn't get the sander under the deck structure. That also included the Dremel multimax. When I did get sandpaper on the wood it didn't do anything against the 40+ years of varnish. I then tried environmentally friendly varnish stripper. Let's just say Environment 1 varnish 0. It didn't budge that old varnish. The last point of attack was the old standby, old style paint remover. That stuff worked. It took off everything! I'll clean up the rest of the interior in the next few days.
 |
Friday, January 6, 2012
Other boats
This is what I do when I'm not restoring or building Moth boats. I build cedar strip canoes. I started doing this when I retired. The first boats were made from 1/4 inch thick by 3/4 inch wide cedar strips. The canoes turned out very nice to the point that I could sell them. The problem that I had was the weight of the boats. The 1/4 inch boat were coming out around 35 pounds. Given the small size (11.5 feet long) I thought that was too much. Some research said you could build using 1/8 inch strips so I tried it. This is the result.
The canoes have 6 oz fiberglass on the exterior and 6 oz Kevlar on the inside. The Kevlar gives the strength to the 1/8 inch strips.
 |
| This one weighs 17 pounds |
 |
| This one weighs 21 pounds. |
The canoes have 6 oz fiberglass on the exterior and 6 oz Kevlar on the inside. The Kevlar gives the strength to the 1/8 inch strips.
Both are for sale!
Thursday, January 5, 2012
 |
| This is the original mast partner. |
 |
| This is the new partner |
Sunday, January 1, 2012
Deck deconstruction
 |
| In sailing shape, but not race ready. |
 |
| Shane did the deconstruction |
 |
| This block held a small tube that allowed the headstay to be adjustable. I eliminated the block. |
Subscribe to:
Comments (Atom)


